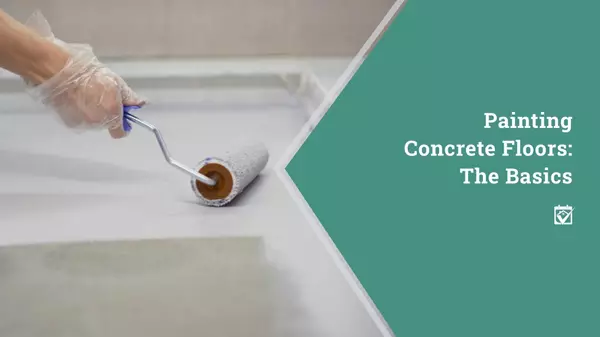
Painting Concrete Floors: The Basics
When most people think of flooring, they picture things like carpet, wood flooring, tiles, and other common floor coverings. There are other options available to homeowners though, including concrete floors. While concrete was once seen mostly in places like basements and garages, it’s becoming increasingly common in the main floor of homes as well. Concrete flooring with built-in radiant heating systems is becoming a lot more popular, especially in areas that tend to have more severe winters. Some people think that concrete flooring is limited in its decorative options, assuming that the only thing you can do with concrete is apply a sealant or stain. There are other options available, though, including painting the concrete. But be careful before just slapping a coat of paint onto a concrete floor; there are a few things that you should know first. Prepping the Surface One of the biggest problems that people have with concrete floors is trying to paint them without having adequately prepped the concrete surface first. In order for paint to adhere to concrete well, the surface needs to be rough enough for the paint to get a good hold, and it also needs to be clean and dry. This can mean a little more prep time than some other types of flooring, but the end results are definitely worth it. Seal any cracks in the concrete with concrete filler, then sweep the concrete to remove any dust or loose debris. Scrape off any old paint or other materials that are stuck to the floor. Wet the floor with a sprayer or mop, then apply a concrete degreaser and scrub the surface with a stiff-bristled broom to clean it. Rinse well and clean up any excess water with a wet/dry vac so that the surface can dry completely before you start painting. Painting and Sealing Once your floor is completely dry, it’s very important to put down at least one or two coats of primer that’s designed for use with concrete before you actually start painting. Tape off all of the baseboards and other areas that you want to protect, then start applying your primer at the edges and work toward the middle. Try to get each coat applied in a single painting session, as you don’t want to let the primer dry in patches that will show through in the final paint application. Allow each coat a chance to dry completely before starting on the next, waiting up to 24 hours if necessary to ensure that it’s fully dry. Once you’ve applied your primer, it’s time to start painting. Use a concrete-friendly epoxy paint and follow the same application instructions that you used with the primer. Get good coverage along all of the edges before moving in toward the center and allow each coat a chance to dry completely. Once your paint is completely dry, apply a concrete sealer and follow the manufacturer’s directions to ensure that it cures properly. Ventilation and proper masking are especially important for this step, as come sealers can release fumes that you don’t want to breathe. Understanding the Project Scope Painting concrete floors can be intimidating because the process is a bit more involved than your standard paint job. If care isn’t taken to ensure that the floor is properly cleaned beforehand and sealed afterward then you can end up with bubbles and peeling paint down the road. Getting all of your materials together before the job starts and following all material instructions will save you a lot of trouble in the long run, since you won’t have to stop to go get something or run into issues with improperly applied coats. For this reason, some people choose to hire professional painters for concrete even when they would tackle other painting projects themselves. If you want to bring someone in to give your concrete floors a new coat of paint, HomeKeepr can help. Sign up for a free account today to connect with painting pros in your area who can get your concrete painted right.

A-door-able Updates!
It goes without saying that your doors are an important part of your home. They provide security, help to control the temperature, and even play a big part in the overall look of your home. Your front door is one of the first things that people notice when coming to your home, and the state that your door is in can have a noticeable impact on the impression that people have of your house and property. Stop and think about it for a moment: What sort of a message is your front door sending? If you don’t like what your door is saying or aren’t really sure how others view it, you might consider getting an upgrade. There are a few different types of updates you can give to your door depending on what you want and the sort of budget you’re dealing with, so you definitely have options. Here are a few things to think about while trying to decide if you’re ready to update your door or not. Does Your Door Need an Update? The first thing you should think about is whether your door actually needs updating. Don’t just think about your front door, though. While that’s the door in your home that gets the most attention, you should also stop and think about interior doors, back doors, and other doors that you, your family, and your guests will see. These other doors aren’t as likely to need a major update, but if they’re damaged or otherwise out of style then you might consider making some changes. As you consider your doors, look at their physical condition: Is there any visible damage, or perhaps weathering or warping? Do the doors have trouble opening or closing, even after tightening hinge screws or making other adjustments? Think about how they look and how well they match the surrounding walls or other fixtures like shutters; do their colors and styles cause them to blend in, stand out, or contrast? What about features such as windows or other design work in the doors? Do they match what you envision for your home? This may seem like a lot of questions, but you want to consider both the look and the functionality of your doors when trying to decide whether to update or replace them. Door Upgrade Options If you’ve spent some time considering either your front door or other doors in your house and found them in need of some changes, it’s time to think about exactly what sort of change you want to see. Is it something subtle, or something more significant? Regardless of how you’d like to change the look and feel of your home, there’s likely some door updates and upgrades that can help you achieve it. One of the most basic updates you can make to your door is to change its color with a fresh coat of paint. This can be especially useful if you just want your door to stand out a bit more and appear more welcoming. If you want a larger color upgrade, paint the door and then paint or replace your window shutters to match. Windows or other door inlays can be installed into some doors, though it’s more likely that you’ll buy a new door to accomplish this major change in look. There are a few other reasons to buy a new door as well, especially if you’re looking at damage or warping. There are both wood and metal doors available depending on your needs, so be sure to shop around to find the perfect doors for your home. Getting the Door of Your Dreams Whether you want a new paint job, a brand-new door, or large-scale updates to the door and other features of your home, finding the right pro to help you can be a big task. Fortunately, it’s one that HomeKeepr can make a lot easier. Sign up for a free account today to connect with the contractors, painters, and other pros who can give your door (and your home) the update that it needs to totally revamp its look.

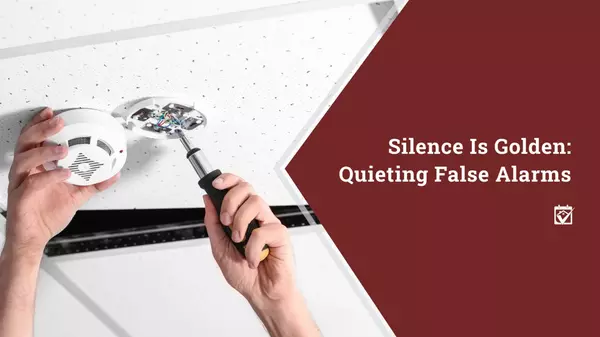
Silence Is Golden: Quieting False Alarms
Alarms play an important part in keeping your home safe. Smoke alarms and other fire alarms can give you an early warning in case a fire breaks out somewhere in your house, which is why it’s recommended that you keep your alarms in working order. To make this easier, some homeowners opt for hardwired alarms which don’t require periodic battery changes to stay active; these alarms are powered by your home’s electrical wiring, so they’re always functional as long as you have power. Unfortunately, these alarms sometimes go off when there isn’t a fire threat as well. While you don’t want your smoke alarm or other warning system to miss signs of an actual fire, it can be pretty frustrating if your alarm goes off all the time when there’s no actual danger. If you have issues with an alarm that seems to always be going off, here are a few things that might help. Cleaning Your Alarms If you have a smoke alarm that’s way too sensitive, especially if I didn’t used to be, then there’s a good chance that you need to clean it. Dust, dirt, and similar small particles are some of the most common causes of alarms becoming too sensitive over time. The reason that this occurs is that these small particles can interact with your alarm in the same way that smoke particles do, triggering its sensitive mechanisms. Carefully cleaning your alarm with canned air or using a vacuum designed for electronics use can remove the dust and restore the alarm to proper working order. It’s worth noting that insects might also be part of the problem with your alarm, especially if there’s a bit of a dust buildup on the alarm unit. These may be cleared out when you blow the dust free from your alarm, but it’s possible that you’ll need to place insect baits or spray bug spray on the wall near your alarm to help get rid of them. Just make sure that you don’t spray the alarm itself, and keep in mind that even spraying near the alarm might temporarily set it off. Humidity Issues If dust isn’t the culprit for your overly sensitive alarm woes, humidity might be the problem. If the humidity is too high, water condensing on the sensors within the alarm, or even just water vapor or steam interacting with those sensors, can interfere with the alarm and cause it to go off. This can be especially problematic as too much water within the alarm can actually damage the alarm mechanism and cause it to completely stop working or start sounding all the time. If humidity is your issue, the only way to take care of the problem is to remove the humidity. This can be accomplished with a dehumidifier placed in overly humid rooms, pulling water from the air and keeping it from affecting the alarm. If the problem is that the alarm is too close to a stovetop or otherwise being exposed to steam, you’ll need to do a bit more work to fix the issue; you’re going to have to install a hood, vent, or some other method of redirecting the steam before it comes in contact with the alarm. If you don’t, the steam will likely ruin the alarm sooner or later. Professional Maintenance In some cases, issues with smoke alarms are caused by electrical problems or insufficient current to keep them properly powered. For battery-powered alarms, all that’s required is to change the battery every few months to keep the alarm in good working order. With hardwired alarms, though, it’s a little more complicated. You’re going to need to call in an electrician to check out the situation, and they’ll either have to fix the wiring or possibly replace the alarm if it’s found to be defective. Fortunately, HomeKeepr can help you find the electrician to straighten out your alarm woes. Signing up is free, so join today and get connected with the pro you need to get the job done.
Categories
- All Blogs (118)
- Appliances (9)
- Bathroom Remodeling (8)
- Buying (11)
- Cabinet Specialists (8)
- Cleaning (12)
- Decks and Patios (9)
- Decluttering (8)
- Electrical (14)
- finance (8)
- Fireplace (8)
- Flooring (9)
- Foundation (8)
- Garage Doors (8)
- Garage Specialist (7)
- General Contracting (24)
- Handyman (9)
- Heating and Air-Conditioning (21)
- home (12)
- Home Improvement (35)
- Home Safety (12)
- Home Stagers (7)
- homedecor (11)
- house (11)
- Insulation (9)
- Insurance (11)
- Interior Decorating (17)
- interiordesign (12)
- Kitchen Remodeling (9)
- Landscaping (20)
- Lender (6)
- Mortgage (13)
- Paint (7)
- Painting (13)
- Pest Control (7)
- Plumbing (14)
- Pool (7)
- Roofing (9)
- selling (15)
- Smart Home (8)
- Windows (9)
- Winter Prep (7)
Recent Posts


